- 精华
- 0
- 帖子
- 1087
- 威望
- 0 点
- 积分
- 1428 点
- 种子
- 7 点
- 注册时间
- 2004-10-16
- 最后登录
- 2023-6-9
|

楼主 |
发表于 2008-5-9 19:37 · 台湾
|
显示全部楼层
順便貼燒UDF 2.5的教學
Burn AVCHD disc with ImgBurn
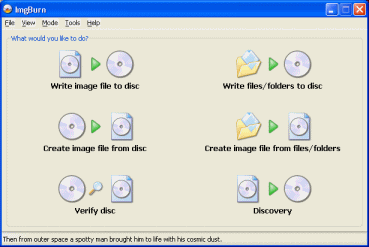 Download and install the ImgBurn utility[/COLOR], and then run it from a shortcut on your Desktop or in your Start Menu. You will get the welcome screen which is very easy to understand. Download and install the ImgBurn utility[/COLOR], and then run it from a shortcut on your Desktop or in your Start Menu. You will get the welcome screen which is very easy to understand.
The option you must click is Write files/folders to disc.
ImgBurn Build Mode
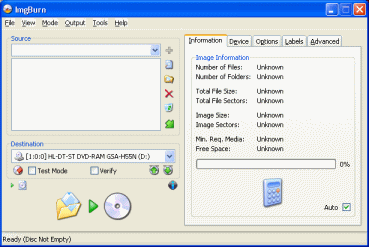 The next thing you will see is ImgBurn in build mode. You don't need to concern yourself with much of these settings, just make sure you have a blank DVD disc in your drive with enough capacity for your CERTIFICATE and BDMV folders. The next thing you will see is ImgBurn in build mode. You don't need to concern yourself with much of these settings, just make sure you have a blank DVD disc in your drive with enough capacity for your CERTIFICATE and BDMV folders.
The next thing to do is to click the Open Folder button. The open folder button is one of the small six icons beside the source box. Click it and browser for the CERTIFICATE folder and import it, and do the same for the BDMV folder... that's when you should get an alert.
UDF 2.50 file system
 For Blu-ray Disc and AVCHD[/COLOR], you must use the UDF[/COLOR] 2.50 file system for compatibility with hardware. You should now receive a prompt (unless you set ImgBurn to UDF 2.50 before). It will ask you if you want it to correct the file system settings. Click Yes. For Blu-ray Disc and AVCHD[/COLOR], you must use the UDF[/COLOR] 2.50 file system for compatibility with hardware. You should now receive a prompt (unless you set ImgBurn to UDF 2.50 before). It will ask you if you want it to correct the file system settings. Click Yes.
Get Ready to Burn
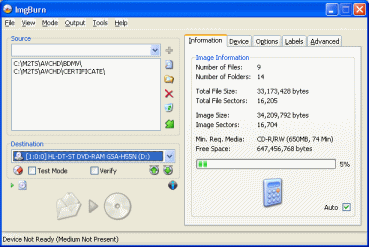 You should have the CERTIFICATE and BDMV folders in the root. Those folders must always be at the root of the disc or it simply won't work with most hardware. When you have a disc inserted you can use the calculator to check if your compilation will fit. If it doesn't, you might have some options to make it fit (but the best option is a dual layer disc). You should have the CERTIFICATE and BDMV folders in the root. Those folders must always be at the root of the disc or it simply won't work with most hardware. When you have a disc inserted you can use the calculator to check if your compilation will fit. If it doesn't, you might have some options to make it fit (but the best option is a dual layer disc).
One such option would be to compress huge DTS[/COLOR] audio streams by converting it to AC3[/COLOR] to save 100s of MBs of space. When you are ready to burn, click the button with the folder and an arrow to a disc.
Volume Label
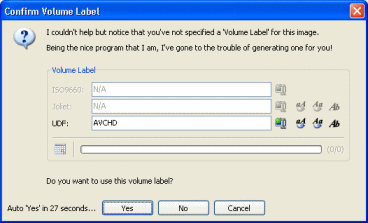 You will now be given an option to give the disc a Volume Label. Truth be told, this is not a very vital process at all, you can name it whatever you want. You will now be given an option to give the disc a Volume Label. Truth be told, this is not a very vital process at all, you can name it whatever you want.
Confirm
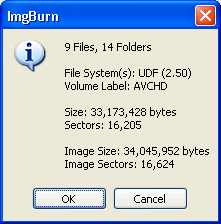 You will now be prompted on the stats of the compilation you are about to burn. Simply click on OK button to begin. You will now be prompted on the stats of the compilation you are about to burn. Simply click on OK button to begin.
The Burning Process
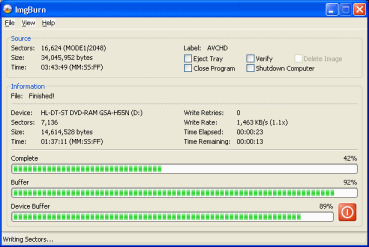 The burning process will now commence. The amount of time this process will take depends entirely on the size of your compilation as well as the speed you are burning your disc at. It should go without errors as ImgBurn[/COLOR] is a very reliable utility. The burning process will now commence. The amount of time this process will take depends entirely on the size of your compilation as well as the speed you are burning your disc at. It should go without errors as ImgBurn[/COLOR] is a very reliable utility.
Success?
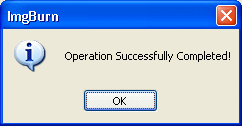 If you have been successful you will now be prompted with a message telling you so, and ImgBurn will play a sound (don't get a fright!). If you have been successful you will now be prompted with a message telling you so, and ImgBurn will play a sound (don't get a fright!).
Finally?
That concludes creating and burning AVCHD for PlayStation 3 or other Blu-ray hardware. Remember, these are the early days so problems do arise every now and then. However, don't give up. If you run into problems, go to our ***ion Forums [/COLOR](PS3 or Blu-ray forum) and ask for help and our friendly users will diagnose problems that you experience. Thank you for visiting and be sure to check out the rest of our guides for Digital Video, Audio, Consoles, High-Definition, etc. or visit our Hardware section and drool over some gadgets.
Version History |
|
 川公网安备 51019002005286号